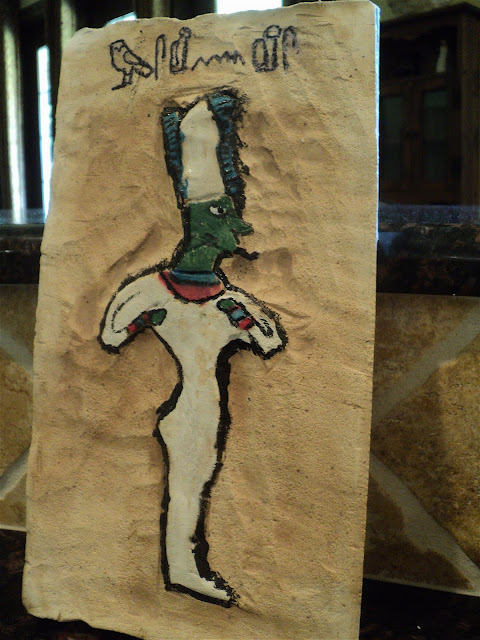
I posted last week about the Ancient Egyptian Relief that Dawson was making. This relief was a really great all-week project. It was so cool that I wanted to repost it with step-by-step instructions and pictures.
First you mix Plaster of Paris, according to the instructions. We made two batches. Pour the creamy plaster into a shoe box lid sprayed generously with cooking spray.
Use any type of carving tool you would like. We had actual clay carving tools that came with our Sculpey clay. But, a toothpick or a nail would work just fine. Start carving as soon as the plaster starts to harden up. The harder it gets, the harder it is to carve. {Dawson learned that the hard way.} Just keep testing it to see how hard it is. It dried much faster than the instructions said it would.
Carve in a picture of your choice. Dawson carved Osiris that he copied out of Ancient Egyptian Drawing Book by Ralph Masiello. We checked this book out of the library. Just carve it as though you are "drawing" the outlines of a picture you are going to color with crayons.
When you are done carving, brush off the excess plaster to make it as smooth as possible.
Let it dry overnight.
The next day use any kind of sandpaper, cut into small squares, and sand all around the outer outline. The deeper you sand, the more your Relief will be raised. Brush away residue as you work. When it is raised to your liking, put it aside until the next day.
On day 3, boil some tea bags to make really strong tea. Use a sponge brush and stain your relief with the tea so it looks antiqued.
Let it dry completely overnight. Then on the final day paint it with vibrant colors. Don't forget to go over all of your carving lines with black paint to make it stand out.
Take off the shoebox.
Dawson added hieroglyphics to his Relief. It says, "Osiris".
Very cool.


Thanks for using my book for this project.
ReplyDeleteI love it!
-Ralph Masiello